What is Pressure sensor accuracy
Pressure sensor accuracy is typically specified by manufacturers as a percentage of the full-scale output or a specific error value, such as ±0.25% of full-scale or ±0.5 psi. Higher-accuracy sensors may have accuracy ratings of ±0.1% or better, while lower-cost sensors may have larger error margins.
It’s important to select a pressure sensor with an accuracy level that meets the requirements of the application.
In critical applications where precise measurements are essential, higher-accuracy sensors may be necessary, while less demanding applications may tolerate lower accuracy levels.
Accuracy has a price
The cost of a pressure sensor is a function of its accuracy, the more accurate the sensor the more expensive it will be. From a manufacturing point of view, the wrong sensors can cause expensive quality or efficiency problems. That is why it is important to understand how manufactures calculate accuracy and recognize what parameters to look at when comparing pressure sensors.
By understanding how manufactures calculate accuracy, you will be able to make a more informed decision when evaluating pressure sensors. Ensuring the next sensor you select will have the required accuracy at right price for application.
What is accuracy? The International Electrotechnical Commission’s (IEC) definition of accuracy is the maximum positive and negative deviation from the specified characteristic curve observed in testing a device under specified conditions and by a specified procedure.
Unfortunately when it comes to defining accuracy for a pressure sensor it’s more complicated. Accuracy has a large effect on the cost of a pressure sensor or even more important, the quality or efficiency of the process it is measuring. It is important to understand what factors determine accuracy and what questions to ask when selecting a sensor.
Accuracy must include Hysteresis, Non-Repeatability and Non-Linearity. Non-Repeatability and Hysteresis are well defined. Hysteresis is the maximum difference in sensor output at a pressure when that pressure is first approached with pressure increasing and then approached with pressure decreasing during a full span pressure cycle. Non-Repeatability is the maximum difference in output when the same pressure is applied, consecutively, under the same conditions and approaching from the same direction.
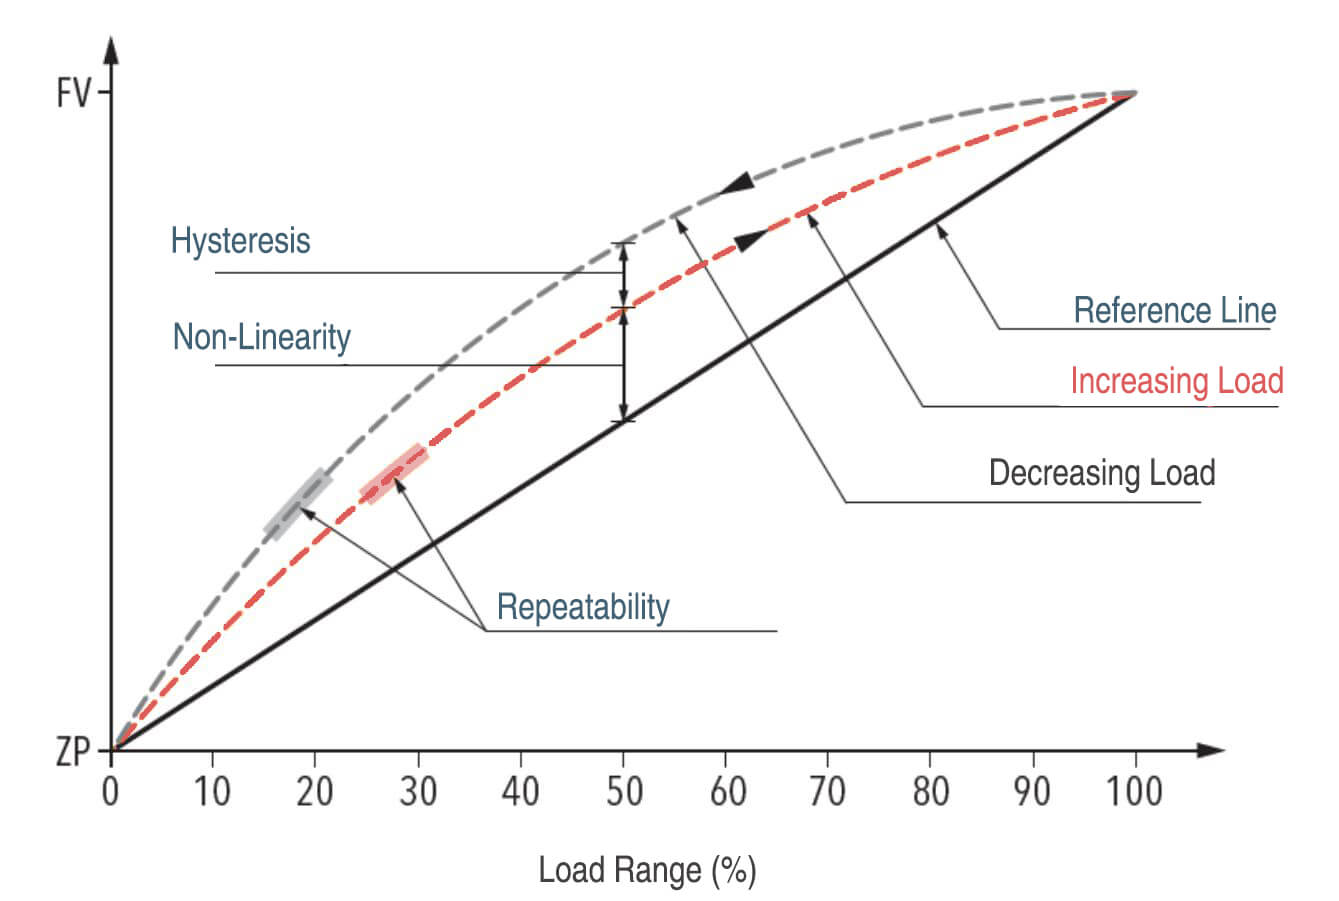
The term “Accuracy” exists only in the users’ language. It is not defined in any standard. Nevertheless, it can be found in many data sheets for sensors. Unfortunately, there is no common idea of what accuracy means. There is not ”one accuracy“ but a large number of different specifications with regard to accuracy, all of them together describe the “accuracy” of a device.

Stability
The accuracy given in data sheets usually describes the condition of a device at the end of the production process. The device can already be exposed to environmental conditions affecting its accuracy negatively from the moment of leaving the manufacturer’s company or warehouse or during transport. It is not important how accurate the device is or if it is of a very high quality, every device changes its accuracy during its service life. This change is called long-term drift or long-term stability.
The dimension of this drift is largely influenced by the operating conditions, i.e. pressures, temperatures and other influences to which the device is exposed. In many cases, stability has a larger influence on the overall deviation than e.g. non-linearity.
Values twice or three times as high are not unusual. Stability data stated by the manufacturer can hardly be compared. Different standards describe very different tests for determining stability.
Furthermore, none of these tests is an actual copy of the real conditions of use. This is not possible because the conditions vary too much from application to application.
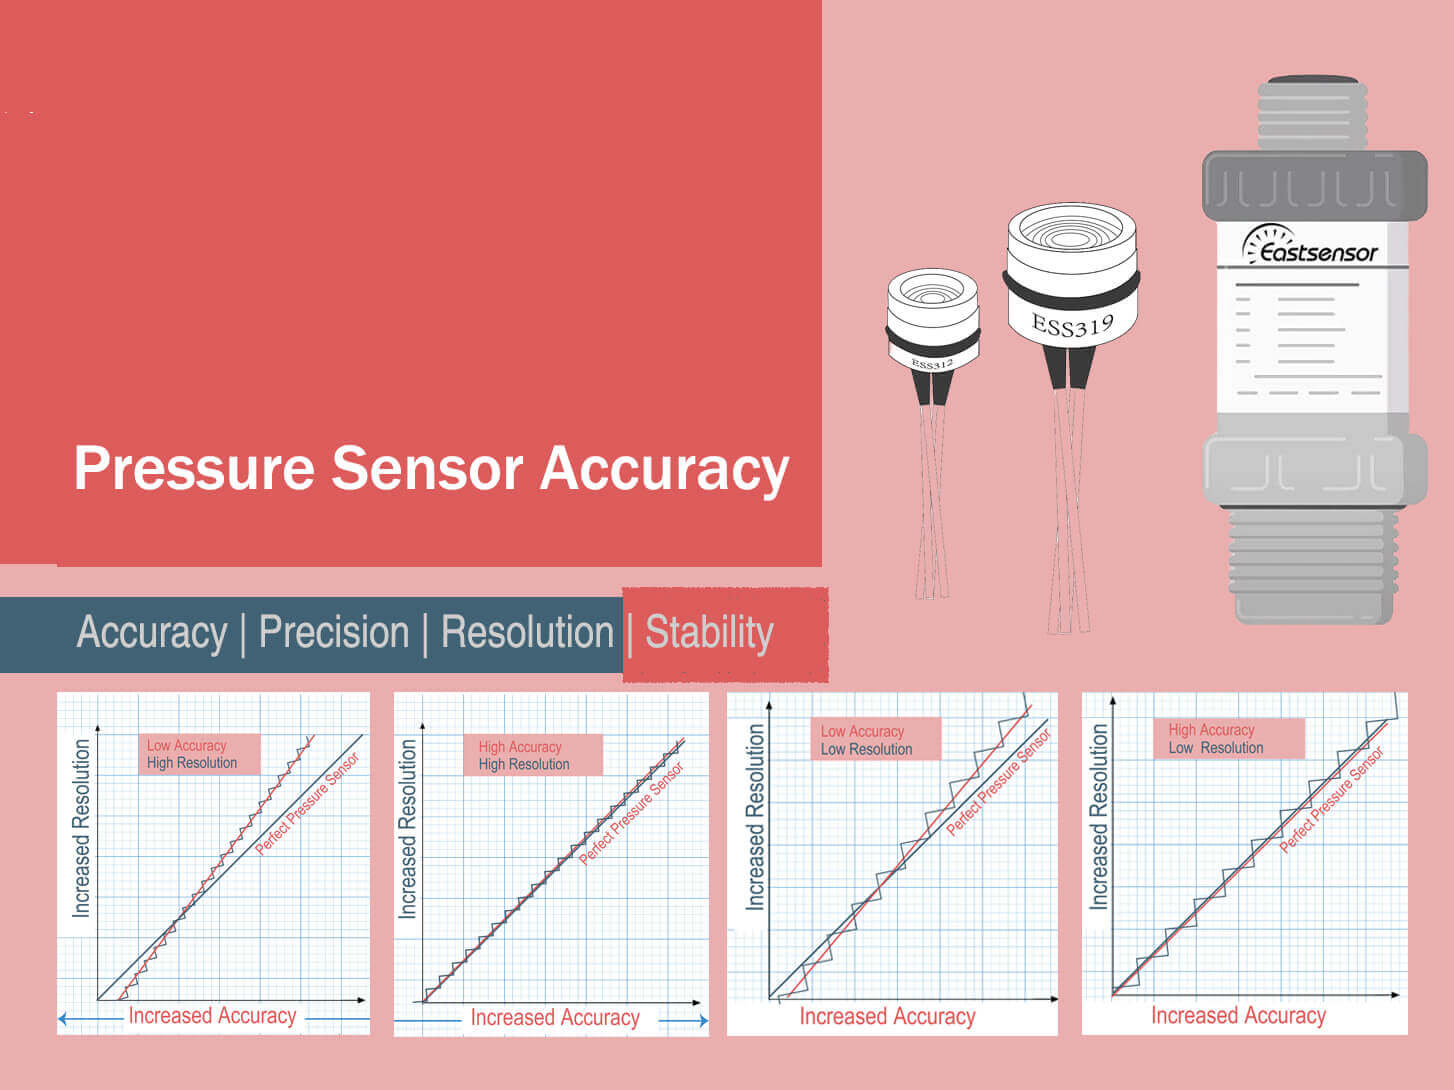
Consequently, stability data are only valid for uses in laboratories or under reference conditions. However, even if used under reference conditions, it is almost impossible to obtain comparable data. You cannot make time go faster. And all attempts to simulate a time lapse effect by means of thermal shocks and other methods are just attempts.
In Practice
Hysteresis and non-repeatability are pretty much the only errors you have to deal with. All other errors can be minimized or even eliminated with some kind of effort. This works easiest and clearest using the offset error.
The user can read the offset error hassle-free in unpressurised condition and enter it as offset in the corresponding evaluation instrument. In order to eliminate the span error, the pressure must be regulated exactly at full scale value. This is often not possible as there is no reference value for the pressure. In order to make the pressure sensor not to measure worse than before, the reference pressure should be three times more accurate than the intended accuracy.
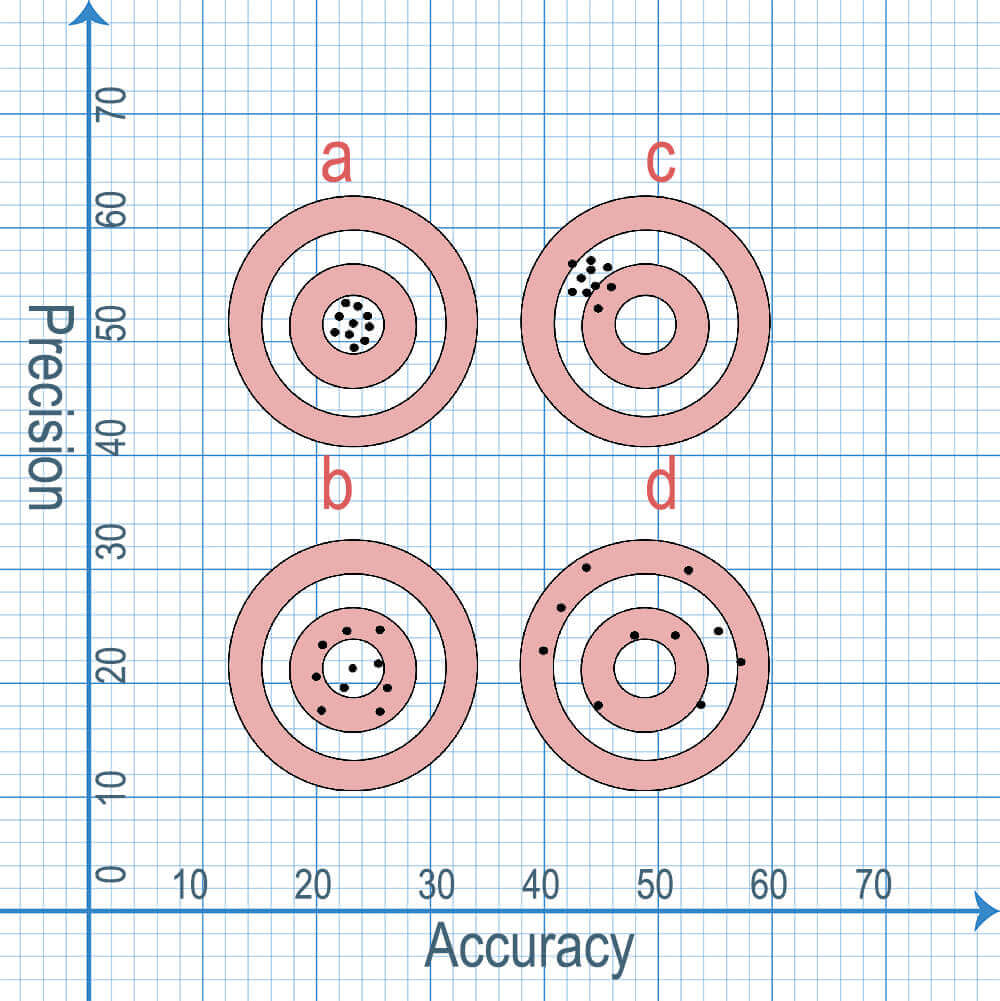
Most manufacturers recommend calibrating the pressure sensors once a year, to control whether they still meet their specifications. The device is not readjusted but the actual change, i.e. the drift, is analyzed. If the drift is higher than the value specified by the manufacturer, this might be an indication for a defective device. The higher the instability, the more probability that the sensor is defective. In this case, process reliability can no longer be guaranteed if the device is still being used.
This check does not require much effort. Often it is sufficient to check if the zero point of the unpressurised device has changed. If the device can neither be checked in the system nor dismounted for examination, you should at least set a high value on a very good stability and respect it in your accuracy specifications. Unfortunately, these are not the only possible sources of error. Vibrations, electromagnetic interferences, mounting position of the sensor, power supply and even the load of the evaluation instrument might affect the accuracy of your pressure sensor. Therefore, individual consulting by a specialist is recommended in many cases.
In a nutshell
Do you know the exact accuracy of your sensor? Is it as good as you have expected? Or is it too good? You are the only person to decide which errors are relevant for you and which are not. The manufacturers’ application consultants explain which product characteristics are important for it and how they can be implemented in your application.
This ensures that you reach your targets with optimum input.
We would be well area of which is the accuracy you presently have and which is the one you actually need.
Additional Posts which may be of interest
- Basic Knowledge You Need to Know about Pressure Gauge
- How to select Pressure Gauge?
- Pressure Switch V.S Pressure Transducer, what’s the difference?
- What is The Difference between Pressure Transducer and Pressure Transmitter?
- Pressure Sensor Technology Comparison
- 10 practices need to considerate before choosing pressure transducer
- What’s the role of smart sensors in Industry 4.0?
- How sensor has been rocking our world?

